Cabinet
 24/7 Support
24/7 Support

Moving your website to a new hosting provider is an important step in ensuring the stability, speed, and security of your resource. Whether you want to improve performance, get better terms, or switch to a hosting provider with better support, knowing how to move your website to another hosting provider will help you avoid unnecessary downtime and data loss.
The migration process involves several stages: from preparing backups to configuring the domain and testing the website on the new server. Proper organisation of each step ensures that you can transfer your website from one hosting provider to another without the risk of losing important information or CMS settings.
In this article, we will look at step-by-step instructions that will help even beginners understand how to change hosting while maintaining the functionality of the website and email. We will also provide useful tips to help minimise risks and ensure the smooth operation of the resource during migration.
Before transferring a website to another hosting provider, it is important to prepare thoroughly to ensure that the process is safe and quick. Preparation helps to avoid data loss, website downtime, and email configuration issues.
First of all, you should make a backup copy of all website files and databases. Save the backup in two places — locally and in the cloud/on external media — and verify that the archive/dump opens. This is a basic security measure that allows you to restore the resource in case of an error during the transfer. In addition, it is worth checking the relevance of the CMS, plugins, and scripts to avoid conflicts on the new server.
You also need to prepare information about the current domain and DNS records, hosting credentials, and access to email accounts if they are linked to the domain. Having this data allows you to easily transfer the site from one hosting to another and quickly complete all the settings on the new server.
In addition, it is worth checking the technical requirements of the new hosting in advance: PHP version, database support, file size limits, and other parameters necessary for the correct operation of your website. Such preparation is a key step in ensuring that the transfer of your website to another hosting is as safe and efficient as possible.
Moving a website to a new hosting provider is a complex process consisting of several logical steps and requiring careful preparation. How carefully you approach each step will determine not only the speed of migration, but also the security of your data, the stability of your website, and its availability to users. Clear step-by-step instructions help minimise risks, avoid content loss and errors in CMS settings, databases or email accounts.
In this section, we will take a detailed look at the entire transfer process: from creating a backup to testing the website on the new hosting. You will learn how to migrate a website to another hosting provider while preserving all files, databases, configuration settings, and email. Each step is accompanied by an explanation of the actions that need to be taken to ensure that the website works correctly and without downtime after migration.
We will also advise you on how to properly prepare the new hosting, create accounts, transfer files and databases, configure DNS, and check the resource’s performance before making the website available to users. By following these instructions, you will be able to transfer your website from one hosting provider to another without any outside help and ensure its stable performance on the new server.
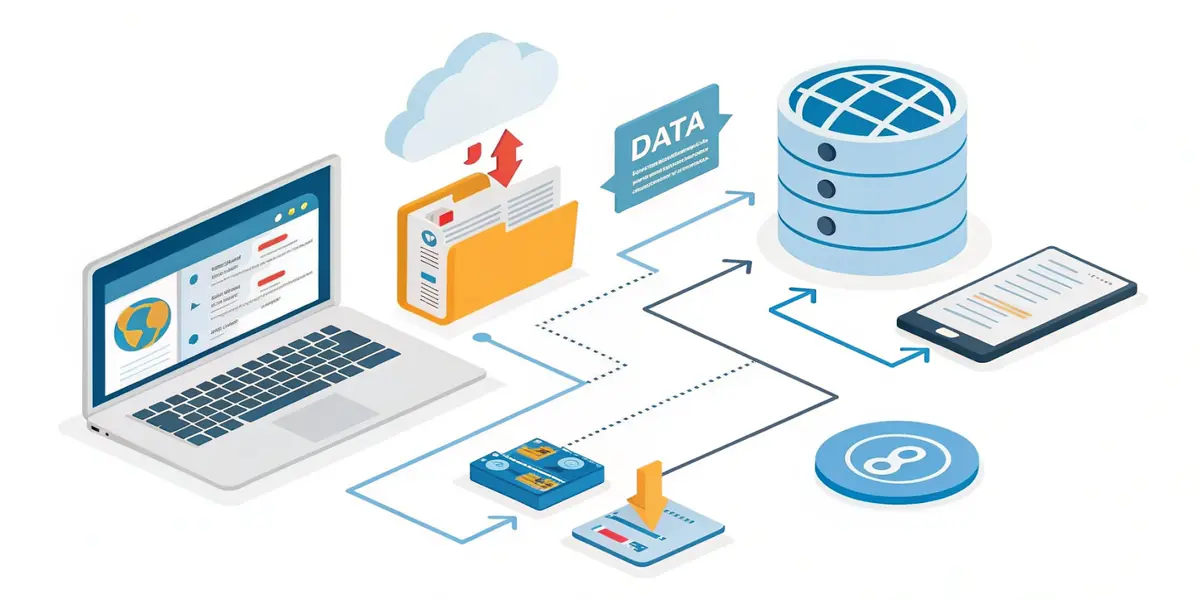
The first and most important step before transferring a website to another hosting provider is to create a complete backup of all files and databases. This ensures that in the event of an error during migration or an unexpected failure, you can quickly restore your website without losing any content or settings.
The backup should include:
To create a backup copy, you can use:
Regular backups not only help when transferring a website from one hosting provider to another, but also ensure the security of your data in any unforeseen situation.
Once you have prepared a backup copy of your data, the next step is to create an account on the new hosting service. This is necessary in order to access the server environment where you will store your website files and databases.
When creating an account, please note the following points:
Once you have your account ready, you can safely proceed to the next step — transferring your website files to the new hosting.
After creating an account on the new hosting, the next step is to transfer the website files. This is necessary so that the website can run on the new server and is ready for database import.
To do this, you can use an FTP or SFTP client, such as FileZilla or WinSCP, to upload all the website directories to the server. An alternative option is to use the file manager in the hosting panel, which is especially convenient for small websites or if an FTP client is not available. Sometimes it is convenient to first create an archive of the website on the old hosting, upload it to the new server and unpack it there — this significantly speeds up the transfer process.
When copying files, it is important to preserve the folder structure and access rights so that the CMS and scripts work correctly. You also need to make sure that all configuration files, including .htaccess or web.config, are uploaded and do not change the names of directories and files to avoid resource path errors.
Proper file transfer is a step that allows you to seamlessly transfer your website from one hosting provider to another and prepare it for further migration steps.
Once the website files have been transferred, the next important step is to import the database to the new hosting. The database contains all the key data of your website: content, CMS settings, user accounts, and other important records, so transferring it correctly is critical for the resource to function properly.
To perform this step, hosting control panel tools such as phpMyAdmin or Adminer are usually used. First, a new database is created on the new server and a user account with full access rights is created. After that, a backup copy of the database from the old hosting is imported into the new database. It is important to check the encoding and table prefixes to ensure that they match the website settings.
Proper database import ensures that after you migrate your website to a second hosting provider, all pages, posts, comments, and user accounts are displayed and functioning correctly, and the CMS can operate without database connection errors.
Once the website files and database have been successfully transferred to the new hosting, the next step is to configure the CMS settings. This stage is critical to ensure that the website connects to the new database correctly and works without errors.
In the CMS configuration files, you need to update the database server information, username, and password, as well as verify the correctness of the path to the main folders and resources of the website. For WordPress, this is the wp-config.php file, for example, and for Joomla, it is configuration.php. Incorrect settings can lead to database connection errors or incorrect content display.
After making changes, you should make sure that all plugins and modules are working correctly, as well as check access to the admin panel. Only then can you be sure that the transfer of the site from one hosting to another was successful and that the CMS is functioning stably on the new server.
If your email is linked to your domain, an important step after transferring your website is to transfer your email accounts to the new hosting. Without this, your emails may stop arriving or being sent, which will lead to downtime in communication with customers and partners.
First, create the same mailboxes on the new server with identical logins and passwords. Then you can synchronize old emails via an IMAP client or use the export/import tools offered by the hosting provider. It is important not to delete old accounts until all emails have been transferred to avoid losing important correspondence.
Properly transferring email when changing hosting allows you to keep all messages, settings, and contacts, as well as ensure uninterrupted email service after you have transferred your website to another hosting provider.
Once the website files, database, and email have been transferred to the new hosting, the next important step is to configure the domain and DNS records. This allows users to access the website via your domain name and ensures that email works correctly.
To complete this step, you need to change the A record or CNAME in the domain control panel, specifying the IP address of the new server. At the same time, you should check the MX records to ensure that email continues to work without interruption. It is recommended to temporarily reduce the TTL (time to live) so that the DNS changes propagate faster and the transfer of the site to another hosting is as painless as possible for users.
Proper configuration of DNS records ensures that after migration, your resource will be available and your email will function stably. This is a key step that allows you to complete the migration process and prepare the site for final testing on the new hosting.
Once all files, databases, email accounts, and DNS records have been configured, an important final step is to test the website on the new hosting. This allows you to ensure that after migration, the resource works stably, without errors or downtime.
Testing includes checking that all pages open, forms work, the shopping cart functions, user accounts can be logged into, and CMS plugins or modules are working. It is also worth checking the site’s loading speed, the correct display of content, and the functioning of email. If errors are found during testing, they should be fixed before the site becomes available to all users.
After thorough testing, you can be sure that you have successfully transferred the site from one hosting to another and that it is ready for stable operation on the new server. This stage ensures that all settings are correct and that users can access the site without interruption.

Migrating a website to a new hosting provider is a process that involves not only technical steps such as transferring files, databases, and DNS settings, but also a number of additional measures to ensure the smooth operation of the resource.
Following these recommendations helps minimise the risks of downtime, data loss, email problems, and lower SEO rankings. In the following sections, we will look at practical tips that will make the process of transferring a website from one hosting provider to another safer and more efficient.
To transfer a website without downtime, you need to prepare all content and databases in advance, create backups, and configure new hosting. This allows you to immediately place files and databases on a new server without waiting for the domain to switch over.
It is recommended to switch DNS during hours of minimal user activity, and after changing the records, temporarily work with both servers in parallel to track possible errors. By following these recommendations, you can safely transfer your website from one hosting to another and avoid downtime for users.
Before changing your hosting and updating your DNS records, you should reduce the TTL (Time To Live). This shortens the time during which old DNS records are stored in the cache of providers and browsers.
As a result, after changing the IP address of the site, users will be redirected to the new server faster, and the risk of downtime will be minimised. Reducing the TTL is a mandatory step if you plan to transfer your website to another hosting provider without interrupting its operation.
Before making the final DNS change, it is important to test the website on the new hosting using a temporary URL or by editing the hosts file on your local computer.
This will allow you to make sure that all pages, forms, plugins, and email are working correctly and avoid unpleasant surprises after transferring the website to the second hosting. This step allows you to confidently check the performance of the resource before users start accessing the new server.
After completing the migration, it is important to check the website’s performance: the correct display of content, loading speed, functioning of forms and integrations, as well as email accessibility.
Particular attention should be paid to connecting to the database and configuring the CMS to ensure that the transfer of the website from one hosting provider to another has been completed without errors and that the resource is working stably on the new hosting provider.
To ensure that your website’s search engine rankings do not drop after changing hosting providers, make sure that the URL structure remains unchanged, redirects are configured correctly, all internal links are working, and the robots.txt file and sitemap are up to date.
It is also important to check the loading speed of the resource. By following these rules, you will be able to transfer your website to another hosting provider without losing your SEO results.
If the website does not open after migration, first check the DNS records and their propagation, database connection, and file access rights. It is useful to clear the cache of your browser and proxy servers.
If necessary, contact the support service of your new hosting provider to check the server settings and ensure stable operation of the website after you have transferred it from one hosting provider to another.
If your email is linked to a domain, you need to transfer it to the new server before changing the DNS. First, create email accounts on the new hosting, then synchronise old messages via IMAP.
Once the transfer is complete, you can update the MX records to ensure uninterrupted email service. This step is mandatory in order to transfer the site to another hosting provider without losing important correspondence.
Transferring a website to a new hosting provider is a process that requires careful preparation and consistent execution of all stages: from creating a backup copy and transferring files and databases to configuring CMS, DNS records, and email accounts. Following step-by-step instructions allows you to transfer a website from one hosting provider to another without data loss, downtime, or malfunctions.
The key points for successful migration are planning, testing the website before and after the transfer, monitoring email and DNS, and applying practical tips for uninterrupted operation of the resource and preservation of SEO positions. By following these recommendations, you can safely transfer your website to another hosting provider, minimise risks, and ensure stable operation of the website for users.
Remember that a properly planned website transfer to another hosting provider not only allows you to preserve all your data, but also improves the loading speed and reliability of your resource on the new server, which is an important component of the successful functioning of any website.
Response

We have been cooperating with Hostpark for several years. We are very pleased with the highly coordinated work! The company always provides quality services and offers favorable conditions. The technical support team responds quickly to requests and, if necessary, provides consultations and explanations. If you have any technical issues, the specialists solve everything promptly! We can safely recommend it.
Sincerely, Mykhailo Savinov, Director of Astelit LLC
AVA Group recommends Hostpark as a reliable partner that has been tested by time. You always stand up for your client's interests, and this is very gratifying. We wish you development and prosperity!
Sincerely, Maxym Shevchuk, President of AVA Group

CFJ Trading LLC expresses its gratitude to HOST PARK GROUP LLC for the successful implementation of the project on the introduction of a new virtual infrastructure hosting based on the Atman data center. Over the three years of cooperation, HOST PARK GROUP LLC has proved to be an expert in its field, with certified engineers and qualified technical specialists involved in the projects. The specialists of HOST PARK GROUP LLC actively participated in the design, construction of infrastructure in accordance with the project requirements, in the development and expansion of the data center, and in its active support. Engineering support in the data center itself was provided in a timely manner and at the appropriate professional level, and the implementation of new capacities was carried out with the highest quality and in the shortest possible time. We would like to note the high professional level of the specialists of HOST PARK GROUP LLC and thank them for the prompt and high-quality implementation of the project. All works were completed in full in accordance with the contractual obligations and terms of reference and in compliance with the deadlines. We look forward to further fruitful cooperation.
Sincerely, V.Yu. Cherniavskyi, Director of Business Development and Support Department, CFJ Trading LLC
Relocating a data center to another facility within Ukraine was already a challenging task even in peacetime. Moving it abroad, and under wartime conditions, was an even greater challenge. However, thanks to the Hostpark team, we were able to complete this process as smoothly and painlessly as possible. UNIVERSAL BANK is a major Ukrainian retail bank. Nearly 10 million citizens of Ukraine are our clients and loyal users of our mobile application, monobank. Ensuring uninterrupted access to our customers’ funds has always been our highest priority. However, with the onset of the full-scale war, fulfilling this task became extremely difficult — all of our data centers were located within Ukraine and were exposed to significant risks. As a result, a decision was made to quickly establish a fully operational data center within the European Union, using the network and server equipment already at our disposal. To accomplish this task, we required a competent partner with experience operating both in Ukraine and in the EU — and such a partner for us was HOSTPARK. The teams of UNIVERSAL BANK and HOSTPARK carefully developed a plan to relocate part of the Bank’s critical IT infrastructure from Ukraine to the EU, selected a suitable location for the equipment within the EU, resolved all related customs and organizational matters in both Ukraine and the EU, and successfully executed the migration plan while avoiding downtime and maintaining full control over the process. Currently, our equipment is hosted in one of the EU countries in a specialized data center that meets the highest industry standards. Our data centers in Ukraine and the EU are connected via high-capacity data transmission channels (with HOSTPARK once again acting as one of the providers). Over an extended period of operation, we have proven the reliability of this infrastructure in practice. We would also like to highlight the continuous support provided — we were always in close contact with the HOSTPARK team, and all issues were resolved promptly and professionally. We sincerely recommend HOSTPARK as a reliable partner for organizations seeking to ensure the highest level of stability and security for their IT infrastructure.
Yours sincerely,
Acting Chairman of the Management Board
JSC “UNIVERSAL BANK” Valerii ZADOROZHNYI


Ask us and our managers will contact you as soon as possible.